First make sure you leave a good 15 inches of binding before you start sewing it on and when you come to the end leave 15 inches of working space between where you start and end the inital sewing of your binding. I found that this really makes a big difference instead of the usually 8 - 12 inches.

Next take the right hand strip and unfold it so it lays flat against your cutting board.

Place you 6" square ruler on point and the middle line is lined up against the left hand side of the strip and the first inch of the ruler is above the bottom of the quilt.

Take your rotary cutter and cut along the diagonal at the bottom of the ruler.

Your right hand strip should look like this.

Take the left hand strip and place it along the edge of the quilt. Carefully flip open just the top layer and take a pin and pin down the bottom portion where the binding is attached to the quilt (left hand side) and again at the opposite end (right hand side). (click on picture for better details)

Now carefully fold over the left hand side and pin it about 2 inches from the first pin.

Bring the left hand strip of binding and lay it on top of the opened up binding.

Lay your 6 inch ruler over the edge of the left hand strip. Draw a line across the entire back of the right hand piece to mark where the left hand piece ends.

Draw two more lines 1/4" apart from the original line that you drew going towards the unattached end of the right hand binding piece. (click on picture for better details)

Cut off excess binding.

Lay the 2 binding strips back on top of the quilt in their normal positions.

Bring the right sides together of the right and left hand binding strips and flip so that you now have the wrong side facing you. If you scrunch your quilt here it will be easier.

Place a pin in the middle and at either end. At the ends you will notice that you will have points extending beyond the regular line of the binding. This is the way is should look. See areas in green circles. (click on picture for better details)

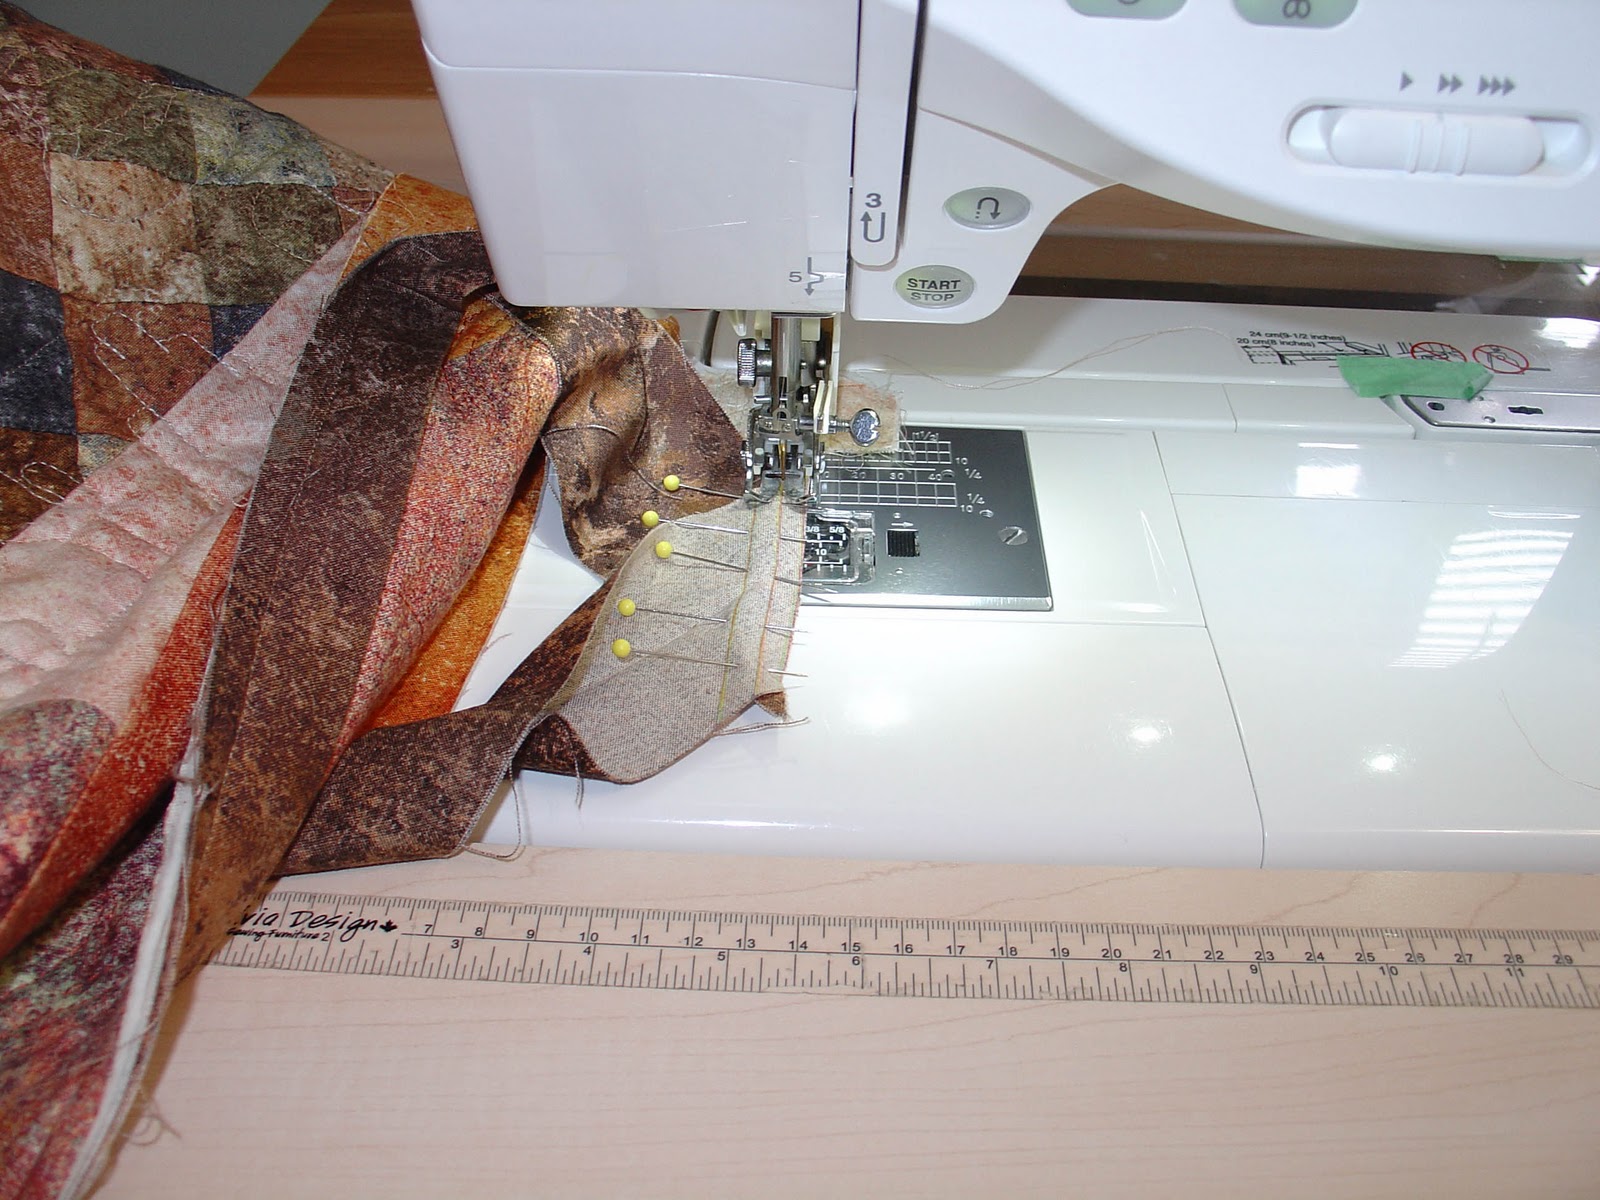
Add a couple of extra pins to ensure nothing shifts.

Now you sew down the middle line of the three that were drawn.
Take the pins out and finger press the seam open.

Fold the binding back into position and check to see that it is the appropriate length. At this point you can trim the points.

Now finish sewing the rest of the binding. As you can see from my binding it was the right size for this quilt.

I hope that is has been of help and if you have any questions please feel free to ask and I will try to help you out.
1 comment:
Thanks, this is something I will certainly refer back to when I work on binding my next quilt.
Post a Comment